Java クライント開発における Web API の実装アプローチ:その3 Swagger(OpenAPI)Code Generate 編

前回は シンプルな REST API 実装をお送りしました。
今回は、前回見えてきた課題点も踏まえながら、Swagger(OpenAPI)を利用した Web API実装アプローチを見ていきます。
最初の記事はこちらから。
Swagger(OpenAPI)って何?
その前に少しだけ、Swagger(OpenAPI)に触れておきます。Gtihub の「The OpenAPI Specification」では、以下のように記載があります。
OpenAPI Specification(OAS)は、ソースコードへのアクセス、追加ドキュメント、またはネットワークトラフィックの検査を必要とせずに、人間とコンピュータの両方がサービスの機能を発見して理解することを可能にする、 プログラミング言語に依存しないREST APIの標準的なインターフェイス記述を定義します。
ここで一つポイントとなるのは REST API の記述用言語とそれに伴うエコシステム全体を指すということです。
ベースとなる考えは、REST API の仕様(URLパラメータや認証方式、HTTPメソッドは何を使うのか、レスポンスの仕様、JSON構造はどうなっているのか?等)を記述するための仕様であるということ。
以下のよなYAML(もしくはJSON ベース)でその仕様を記述します。
paths:
  /categories:
    get:
      summary: Return categories
      description: >-
        Returns records from the categories entity that match the specified
        query parameters.  All records will be returned when no parameters are
        specified.
      tags:
        - categories
      operationId: getAllcategories
      parameters:
        - name: $select
          in: query
          type: string
          description: >-
            A comma-separated list of properties to include in the results. When
            this field is left empty, all properties will be returned.
        - name: $orderby
          in: query
          type: string
          description: >-
            Order the results by this property in ascending or descending
            order.  Example for ascending: 'Name ASC' Example for descending:
            'Name DESC'
        - name: $top
          in: query
          type: integer
          description: The number of results to return.
        - name: $skip
          in: query
          type: integer
          description: This is the offset of results to skip when returning results.
        - name: $count
          in: query
          type: boolean
          description: >-
            When set, the results will return a count of results and not the
            actual results.
        - name: $filter
          in: query
          type: string
          description: >-
            Use this to filter the results by specific property values. For
            example, you can use the following filter to retrieve records with
            the name 'John': $filter=Name eq 'John'
      responses:
        '200':
          description: categories response
          schema:
            type: object
            properties:
              value:
                type: array
                items:
                  $ref: '#/definitions/categories'
この仕様があるおかげで、Swagger エコシステムでは、API ドキュメントの自動生成やテスト・ライブラリの生成などを実現することが可能になっています。

SOAP では WSDL、JSONだとJSON スキーマなどの仕様記述様式がありますが、そのREST 版であると捉えると、わかりやすいかなと。
OpenAPI(Swagger)で公開されているサービス
OData や GraphQL は日本でまだまだ馴染みが薄いですが、Swagger は結構人気な気がしますね。
国産クラウドサービスですと、「freee」や「CloudSign」「SmartHR」など
・freee:https://developer.freee.co.jp/docs/accounting/reference
・CloudSign:https://app.swaggerhub.com/apis/CloudSign/cloudsign-web_api/0.8.0
・SmartHR:https://developer.smarthr.jp/api/index.html
また、SendgridもSwaggerベースでドキュメントが公開されています。
・Sendgrid https://github.com/sendgrid/sendgrid-oai
その他、API Spec系
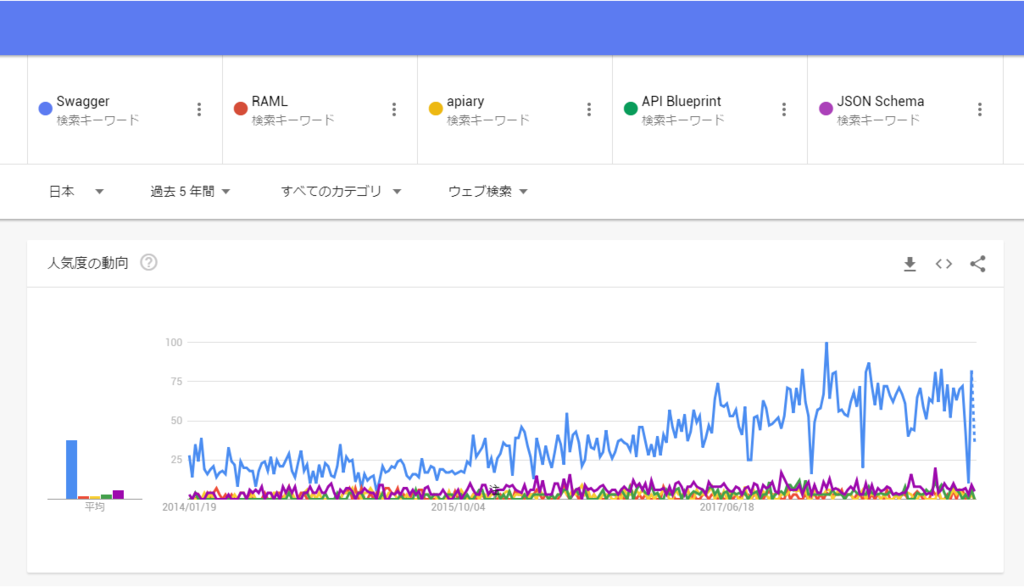
ちなみに、他にもAPI Spec系のサービス・仕様はありますが、トレンドの状況を見るとほぼ Swagger 一強かなと感じます。
・RAML https://raml.org/
・apiary.io https://apiary.io/
・JSON Schema https://json-schema.org/
・API Blueprint https://apiblueprint.org/

対象の API

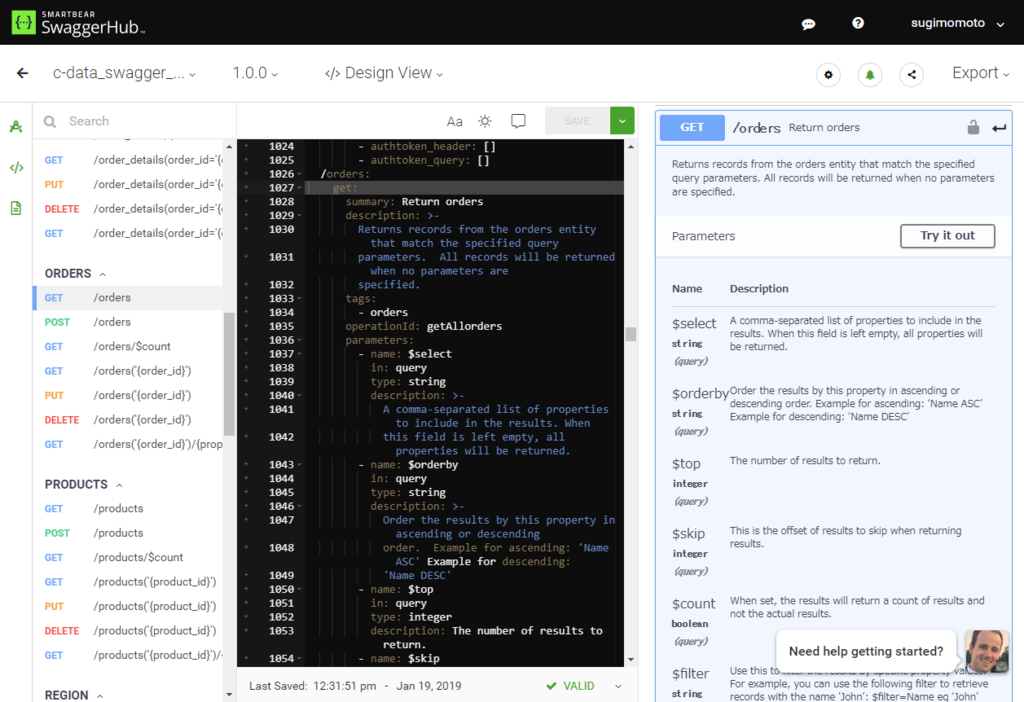
対象の API は前回と一緒です。同じようにODataベースの REST API ではありますが、今回は Swagger(OpenAPI)でドキュメントが公開されている、ということを前提に進めます。
https://app.swaggerhub.com/apis/sugimomoto/CDataNorthWindSample/1.0.0
操作も同じように注文データ(orders)と注文明細データ(order_details)を取得して結合したものをコンソールで出力するというものです。
Client SDK の Code Generate
それでは、まず今回のキモとなる Client SDK Generateを行います。
SwaggerHub の API ドキュメント画面にアクセスすると、画面右上に「Export」ボタンがあります。
ここから、Server Side の Mock や Client SDK をダウンロードすることができます。

以下のようなフォルダーが生成されます。デフォルトで Marven の pom.xml などが含まれているので、

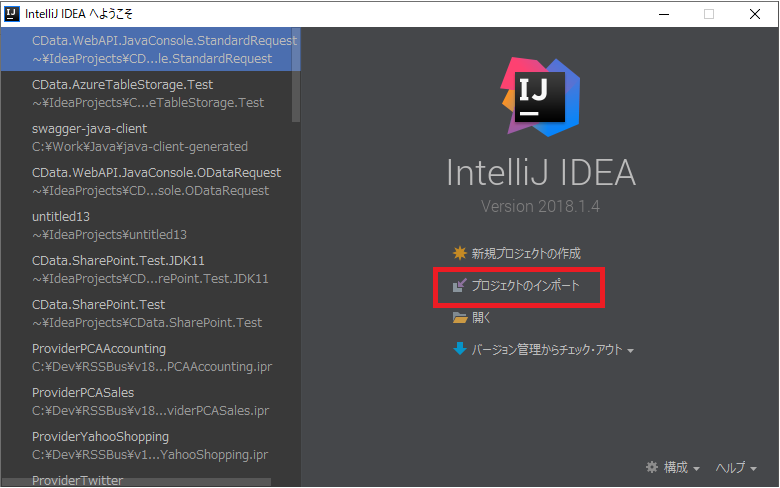
そのまま IntelliJ IDEA などでプロジェクトとしてインポートできます。

プロジェクトを展開して、まずポイントとなる部分だけみてみましょう。
「package io.swagger.client.api」には、各エンドポイントのAPI 実行のコントロールを行うためのClientクラス郡が入っています。

「package io.swagger.client.model;」には、取得できるJSON Objesをシリアライズ・デシリアライズするための Class が自動生成されていることがわかります。
このあたりを全部自動生成してくれるのが、素晴らしい!

また、Test フォルダを覗くと、各エンドポイントの網羅的なテスト用のベースになる Class も自動生成されていることがわかります。
これらも Swagger Spec をベースに生成されるので楽ですね。

「README.MD」ファイルには、Getting Started として、最初にリクエストを実施するためのサンプルコードも記載されていますので、使い方を把握するのも結構楽ちん。
[ Getting Started ]
Please follow the installation instruction and execute the following Java code:
import io.swagger.client.*;
import io.swagger.client.auth.*;
import io.swagger.client.model.*;
import io.swagger.client.api.CategoriesApi;

import java.io.File;
import java.util.*;

public class CategoriesApiExample {

    public static void main(String[] args) {
        ApiClient defaultClient = Configuration.getDefaultApiClient();

        // Configure API key authorization: authtoken_header
        ApiKeyAuth authtoken_header = (ApiKeyAuth) defaultClient.getAuthentication("authtoken_header");
        authtoken_header.setApiKey("YOUR API KEY");
        // Uncomment the following line to set a prefix for the API key, e.g. "Token" (defaults to null)
        //authtoken_header.setApiKeyPrefix("Token");

        // Configure API key authorization: authtoken_query
        ApiKeyAuth authtoken_query = (ApiKeyAuth) defaultClient.getAuthentication("authtoken_query");
        authtoken_query.setApiKey("YOUR API KEY");
        // Uncomment the following line to set a prefix for the API key, e.g. "Token" (defaults to null)
        //authtoken_query.setApiKeyPrefix("Token");

        // Configure HTTP basic authorization: basic
        HttpBasicAuth basic = (HttpBasicAuth) defaultClient.getAuthentication("basic");
        basic.setUsername("YOUR USERNAME");
        basic.setPassword("YOUR PASSWORD");

        CategoriesApi apiInstance = new CategoriesApi();
        Categories categories = new Categories(); // Categories | The categories entity to post
        try {
            Categories result = apiInstance.createcategories(categories);
            System.out.println(result);
        } catch (ApiException e) {
            System.err.println("Exception when calling CategoriesApi#createcategories");
            e.printStackTrace();
        }
    }
}
それでは、実際に実装を進めていきます。
実装コード
Java クライアントアプリケーションから Swagger Client SDK を利用するにあたってのポイント
前回投稿した HTTP Client を実装してアプローチする場合に比べて、だいぶスッキリしたと思います。
認証周りや接続設定はApiClientをベースに、各 Swagger Specで定義されているパラメータが setpropertyName 形式で生成され、提供されているのでわかりやすいですね。
    ApiClient defaultClient = Configuration.getDefaultApiClient();
    defaultClient.setApiKey("XXXXXXXXXXX");
また、実査しにOrdersなどを取得する際に使っている getAllorders のメソッドの引数もポイントです。
以下のように、「String select, String orderby, Integer top, Integer skip, Boolean count, String filter」と6種類の引数が提供されているのですが、
    /**
     * Return orders
     * Returns records from the orders entity that match the specified query parameters.  All records will be returned when no parameters are specified.
     * @param select A comma-separated list of properties to include in the results. When this field is left empty, all properties will be returned. (optional)
     * @param orderby Order the results by this property in ascending or descending order.  Example for ascending: 'Name ASC' Example for descending: 'Name DESC' (optional)
     * @param top The number of results to return. (optional)
     * @param skip This is the offset of results to skip when returning results. (optional)
     * @param count When set, the results will return a count of results and not the actual results. (optional)
     * @param filter Use this to filter the results by specific property values. For example, you can use the following filter to retrieve records with the name 'John': $filter=Name eq 'John' (optional)
     * @return InlineResponse2004
     * @throws ApiException If fail to call the API, e.g. server error or cannot deserialize the response body
     */
    public InlineResponse2004 getAllorders(String select, String orderby, Integer top, Integer skip, Boolean count, String filter) throws ApiException {
        ApiResponse<InlineResponse2004> resp = getAllordersWithHttpInfo(select, orderby, top, skip, count, filter);
        return resp.getData();
    }
これはそのまま対象エンドポイントの URLパラメータ にマッチングされています。
https://app.swaggerhub.com/apis/sugimomoto/c-data_swagger_api_sample/1.0.0#/orders/getAllorders

今回は OData をベースにしているため、とても素直な URL パラメータですが、それでも HTTP Client ベースで実装した場合のURL パラメータ組み立ての実装コードを一から書かなくてもいいと言うのは、やはりとても楽だなと思います。
おわりに
こうやって実際に実装コードベースで見ていくと、REST API を頑張って実装するのに比べてずいぶん省力化してできるなぁというのが、自分自身よく実感できました。
また、Web API を使う場合、実際の HTTP ベースでリクエストを行うモデルレイヤーだけでなく、最終的なビジネスロジック部分の記述のほうが重要性が高いわけですし、こういったところで省力化できるのはプロジェクト全体にとっても重要な部分だと思います。
それでは、次回は若干毛色を変えて、OData ベースでの実装を見ていきたいと思います。